Ontario's Computer: The Burroughs ICON
![]()
Nicknamed the bionic beaver, the ICON was a Canadian computer funded by the Ontario government and used in schools province wide. It was designed by CEMCorp (Canadian Educational Microprocessor Corporation) and manufactured by Burroughs (later renamed to Unisys). Moreover, it ran the QNX UNIX-like operating system, which was also developed in Canada by two University of Waterloo students.
![]()
If you took a computer programming course in high school during the 1980s or early 1990s, you likely remember learning C, BASIC or Pascal on the ICON, as well as many UNIX commands that would pay off later in college or university. If you didn’t, you probably remember the ICON as a cool looking steel monstrosity that had an indestructible keyboard and trackball (that everyone tried to spin as fast as they could).
My high school had a room full of ICONs tucked away in the basement, but you had to pass through two other rooms full of brand new IBM PCs in order to get to it. The ICON room was dedicated to learning computer programming only, which is one thing these underpowered computers did well. After all, ICONs only had 512 KB of RAM, a 7.16 MHz 80186 CPU, and absolutely NO local storage (NO hard drive, NO floppy drive). When you booted an ICON, it downloaded the QNX operating system from a LEXICON file server in the corner of the room via a 2.5 Mbit/s ARCNET coaxial network. After QNX booted into RAM on your system, you could log in and access your home directory on the LEXICON or run programs that were installed on the LEXICON. Up to 32 ICONs could be connected to a single LEXICON in an ARCNET cluster (LAN).
The LEXICON (discussed in my next blog post) was a boring square-ish box that had nearly identical hardware specifications as an ICON, but also contained a disk controller that provided access to a hard drive (for storing QNX, programs and user files) and a single floppy drive.
If you wanted to save your work to a floppy, you had to go to the LEXICON, put in your floppy, go back to your ICON, run a command that copied the file from your home directory on the LEXICON’s hard drive to the floppy, and then retrieve your floppy from the LEXICON. This process was widely considered too much exercise for any kid enrolled in a computer programming class back then.
Because the ICON was a government initiative, by the time it got to market in 1984, there were already IBM-compatible systems on the market with more RAM, the more powerful 80286 CPU, and local storage for the same cost. Moreover, those systems could run DOS and had a massive library of software applications as a result. The ICON had very few available software applications.
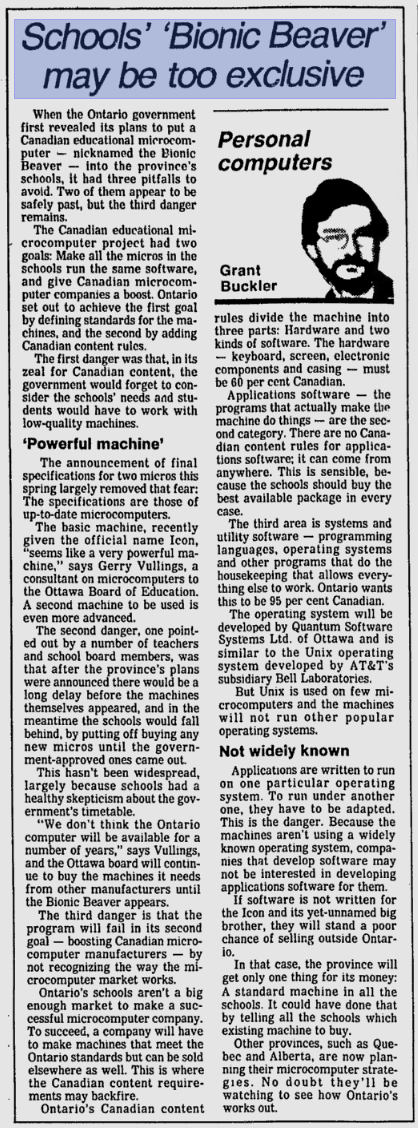
All of this meant that the ICON was widely seen as a waste of public money even before it launched, as illustrated in this October 15, 1983 article from the Montreal Gazette. In addition to the cost of the ARCNET network, LEXICON file server, and software programs, the cost of each ICON at the time was $2500. However, school boards only had to pay $495, and the government covered the remainder with a grant. After heavy criticism for a decade, the government ceased all support for the ICON in 1994 and ordered all ICON hardware to be sent to landfill and software to be destroyed. Luckily, a few ICONs and software survived the purge, and I was fortunate to get one from an old teacher via a friend ;-)
The hardware
The manual that came with the ICON contained some nice illustrations of the components and ports:
![]()
The ports on the rear are shown below. There’s two additional 115V AC outlets (the switched one is typically used for the EGA monitor), a video port that connects to the monitor (with room for a second), two coaxial BNC ports for the network to allow for the daisy chaining of ICONs in a classroom ARCNET network, an external keyboard port (with orange plastic cover), and three blanking plates for future use (RS232 serial and parallel):
![]()
The ICON monitor is on a swivel mount and can be detached from the base by removing 4 screws:
![]()
Removing another dozen screws from the base allows you to detach the heavy metal top assembly (including the keyboard and trackball) and expose the power supply (1), motherboard (2), external keyboard port (3), video port (4), coaxial BNC ports (5), volume control (6) and headphone jack (7):
![]()
After unplugging all the Molex connectors, the motherboard is easy to remove. It contains 512KB of TMS4164 RAM chips (1), two AMD P8255A-5 I/O controllers (2), a 2.5 Mbit/s SMC COM9026 network controller (3), a Hitachi HD46505SP video controller (4), two AM27128ADC system EPROMs (5), a TMS5220CNL speech synthesizer (6), and an Intel R80186 CPU (7):
![]()
The R80186 CPU is held in place using a metal plate. After removing this plate, you can see the CPU and the gold contacts on the reverse:
![]()
The QNX operating system
QNX was one of the first commercial microkernel-based UNIX-like operating systems. And while it was like other UNIX, Linux and macOS systems, there were many aspects that were unique to the ICON.
File paths used the following format: [node]drive:/path
nodeis the network node number of the LEXICON file server. The first LEXICON file server has a node number of 1, the second has a node number of 2, and so on. Since most classrooms used a single LEXICON only, the node number could safely be omitted to use the default of 1.driveis the storage device on the LEXICON (1=hard disk, 2=floppy, 8=RAM disk that stored QNX for copying to ICONs). If you don’t specify the drive, it assumes 1./pathis the UNIX path on that storage device. For example,/user/jason/report.txtis the report.txt file under the jason directory under the user directory under the root directory.
QNX file names could be up to 16 characters and were case sensitive. Programs installed on the hard drive of the LEXICON were included in a search path and could be run by executing their name (e.g. running basic at a command prompt would start Watcom BASIC if it was installed). The /home, /bin, /etc, and /usr directories you’d normally find on modern UNIX systems were not present. Instead, QNX used the following directory structure:
/userstored user home directories (e.g./user/jason)./cmdsstored executable binaries and was automatically included in the search path./configstored system configuration information./sysstored QNX operating system binaries./driversstored hardware drivers (e.g.hdfor the hard drive,fdfor the floppy)/utilstored additional software packages and was automatically included in the search path.
You could add new user accounts using the new_user command, set user passwords using the new_password command, and remove users using the delete_user command. User accounts and their passwords were stored in plaintext within the /config/pass file. The default users within this file included:
root(password=superuser, home directory=/)supervisor(password=maintenance, home directory=/util)teacher(password=control, home directory=/user/teacher)icon(no password, home directory=/user/icon)
Just like in modern macOS UNIX, you could use the say command to have the ICON’s TMS5220CNL speech synthesizer speak the contents of phrase or text file. Simiarly, most standard UNIX commands and shell features (e.g. redirection) were the same in QNX, but there were some notable exceptions:
- The epoch was January 1st 1980 instead of January 1st 1970.
- The
ls(list) command had no long listing option, and directory names were prefixed with a+symbol (e.g.+jason= jason subdirectory). ^was used instead of../when referring to parent directories. For example, if your current directory is/user/jasonand you want to change to the/user/jenniferdirectory, you could run thecd ^jennifercommand to change to the jennifer directory under your parent directory.- The default shell (
/cmds/sh) used#instead of$to denote variables, positional parameters (#1,#2, etc.), and special variables (e.g.#$returned the process ID of the shell). - The UNIX
man(manual page),ps(process),chmod(change mode),df(disk free space),vi(visual editor), andwall(warn all) commands did not exist on QNX. Instead, you had to:- Use the
helpcommand to view help pages that resembled UNIX manual pages (e.g.help lswould list the help page for the list command). Alternatively, you could use the?argument to obtain simplified command help (e.g.date ?would display usage and options for the date command). - Use the
taskcommand to list processes. Parent processes were labelled “father”, child processes were labelled “son”, and child processes started by the same parent were labelled “brother”. - Use the
chattr(change attribute) command to set any file attributes, including the read, write, append, and execute permission attributes. - Use the
querycommand to display the free space on a disk device (e.g.query [1]1would display the free space on the hard drive on the LEXICON). - Use the
editcommand to modify the contents of text files. - Use the
apb(all points bulletin) command to send text messages to all system users. When executed by an ICON user, it sent a message to all ICON workstations connected to the same LEXICON (endless fun in a classroom that usually landed you in trouble with the teacher).
- Use the
To install software on the hard drive of the LEXICON from a floppy disk, you performed these steps:
![]()
- Insert the first floppy disk of the program into the floppy drive on the LEXICON.
- Power on one of the ICON systems and let it boot QNX from the LEXICON. Once booted, log into QNX as a user with rights to install software (
rootorsupervisor). - At the shell prompt, run
print 2:/READ_MEif you wanted to read the contents of the READ_ME file on the floppy (optional, but often listed on the floppy as shown here). - At the shell prompt, run
2:/installto run the installation script on the floppy (alternatively, you could runcd 2:/to switch to the root directory on the floppy and then typeinstall). - The installation script would prompt you for remaining tasks (including when to insert the second floppy disk). Once software was installed on the LEXICON, any ICON user could execute it.
In the following video, I boot QNX on the ICON from a LEXICON file server across an ARCNET network and walk through many of the QNX concepts discussed in this post: https://www.youtube.com/watch?v=pn0SIteAe1k
To see how easy it was to read the /config/pass file and use the apb command, watch this video: https://www.youtube.com/watch?v=kr8ts6zV2DU
So why was the ICON important?
Firstly, it was the system that many Ontarians used to learn how to program. While my high school just taugh C, Pascal and BASIC on them, ICONs could also be used to learn Logo, Turing, Fortran, Cobol and APL. Some schools also used them for teaching typing and word processing, or for educational games (especially elementary schools).
![]()
Secondly, the ICON directly led to the success of QNX. The ICON and LEXICON were QNX’s first big commercial application and demonstrated that QNX was very stable. This, in turn, led to QNX’s adoption by many different embedded systems manufacturers. BlackBerry bought QNX in 2010 and used it for their BlackBerry 10 smartphones and Playbook tablet before switching to Android and ultimately leaving the smartphone market altogether. Today, QNX is used in many newer cars that have touchscreen navigation and controls (including my Ford Edge).
Thirdly and most importantly, the ICON looked cool. It was truly an iconic computer to anyone who grew up in Ontario during the 1980s.