Brewing the Best Coffee

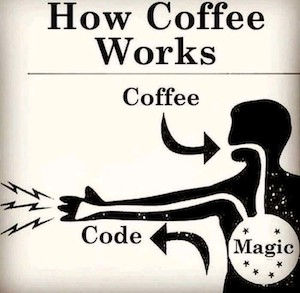
It’s no secret that coffee is one of the most important factors in the development of any technology, including software. In this post, I’ll outline how you can create the perfect cup of coffee to enhance your love of the bean as well as boost software development productivity.
Over the years, I’ve needlessly spent thousands of dollars on expensive coffee-making equipment, including fancy coffee grinders and expresso machines.
But I no longer use any of it, because I can make a better cup of coffee cheaper and faster with just these four items:
- Steel burr manual coffee grinder,
- Kettle with temperature guage,
- AeroPress coffee press, and
- Coffee beans (duh)
Step 1: Obtain your beans
While I’ll drink any utility coffee out there if there’s nothing better around, there definitely is a difference between different brands of coffee. Local coffee roasters often have a nice selection of high-quality beans from around the world that are roasted the way you like (I prefer dark roasts, personally). In Southern Ontario, my favourite roasters are:
- Smile Tiger (https://smiletigercoffee.com)
- Monigram (https://monigram.ca)
- Balzac’s (https://shop.balzacs.com)
- Sparkplug (https://www.sparkplugcoffee.com)
Of course, expect to pay close to $20/bag from a local roaster. A cheaper option is to go with a high-quality big brand name that you can buy at a local grocery store for under $10, such as Starbucks or Seattle’s Best.
It’s equally important to store your coffee beans properly. In most cases, the bags that coffee roasters use do a good enough job of keeping the beans fresh, especially if you use them within a week or two of opening the bag. However, the best option to storing coffee beans is to use an Airscape coffee canister (https://planetarydesign.com/product/airscape-airless-coffee-storage-canister/) to ensure there is no excess air.

Step 2: Grind your beans manually
Simply put, freshly-ground beans always taste better than beans that have been ground and stored previously. So you should always grind your beans for a single cup of coffee just before brewing it.
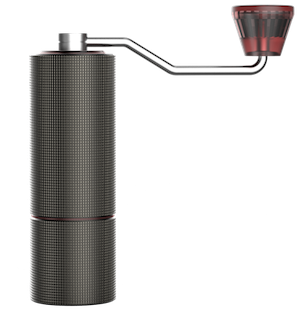
And while you can use an expensive electric burr coffee grinder that costs several hundred dollars to grind a small amount of beans before making a cup of coffee, it’s much cheaper to use a high-quality hand grinder that has a steel (NOT ceramic) burr. I use a Timemore Chesnut C2 grinder (shown here). In addition to being very fun to use, it’s widely considered one of the best hand grinders on the market, and has a nice range of grind settings.
While this grinder often costs over $100, you can find it for about $50 on Amazon if you buy it directly from the Chinese manufacturer - the product listing will have a different brand name, but will have the exact same pictures and be listed next to the Timemore Chesnut C2 in the Amazon search results (almost as if Amazon is promoting it).
Step 3: Boil water to the correct temperature
There actually is a proper water temperature for making coffee. It’s 195-205 degrees Fahrenheit (90-96 degrees Celsius). Most kettles with a built-in temperature guage will also label this range as “coffee” (“green tea” will be lower and “black tea” will be higher). I like to aim for the higher part of the range (205 degrees Fahrenheit) to allow for a bit of cool down during the coffee making process.
You can usually find a good stove top kettle with a built-in temperature guage for under $50.

Step 4: Brew using the AeroPress
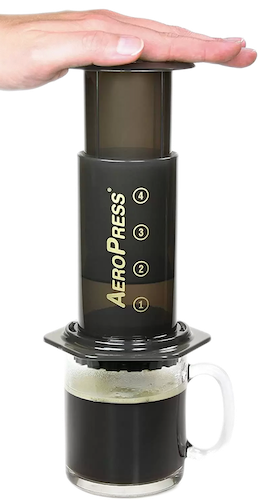
I’m not alone in saying that an AeroPress (https://aeropress.com) makes a better cup of coffee than the most expensive expresso machines out there. In fact, many of the people in the #coffee-lovers channel in my tech community Slack rave about it.
Using an AeroPress is actually quite simple. After adding a small paper filter, you fill the AeroPress with a scoop of ground coffee and hot water, stir it, and press it. Then you top up the coffee in your cup with hot water and enjoy the best Americano you’ll ever have. To see it in action, just visit https://aeropress.com/pages/how-it-works and watch the video.
Alternatively, there are dozens of YouTube videos from avid AeroPressers that vary the procedure to their liking (including inverting the AeroPress). I like to keep my AeroPress brewing very simple, and essentially follow the instructions in the video on the AeroPress website.
One reason why coffee made with an AeroPress tastes so good is that it uses a paper filter. Paper filters take out most of the acidity and water impurities in the coffee, while letting the coffee goodness through. Thank you Melitta Bentz (https://en.wikipedia.org/wiki/Melitta_Bentz) for inventing paper coffee filters!
The AeroPress comes with everything you need (including 350 filters, correctly-sized scoop, and stirrer), and costs under $50. There is also a nifty travel version of the AeroPress that is perfect for taking on trips (I also have this version).
In summary, you don’t need to buy more than $150 in equipment to make amazing coffee. You just need a manual steel burr coffee grinder, a kettle with a temperature guage, and an AeroPress.