SPARCbook teardown

Back in 2019, I picked up a rare SPARC-based laptop from the 1990s running Solaris UNIX (marketed as the ultimate UNIX portable on the Tadpole website in 1997). You can read my blog post on it here: SPARCbook 3000ST: The coolest 90s laptop. It occasionally shows up on Hacker News, and I get plenty of comments whenever I post it on Reddit.
However, I’ve always been curious as to the internals. And while there are a few teardowns of the SPARCbook 3 series, I couldn’t find any for the SPARCbook 3000 series at all. So, I decided to do one myself.
In short, it’s a very simple teardown to do. There is no internal frame that holds each component. Instead, all components connect (in some way) to the bottom of the laptop, which is made of rigid magnesium alloy. To open the laptop, you only need to remove 3 screws from the bottom of the laptop (2 under the small plastic lifts on either corner, and one in the middle under a rubber pad). You can then lift the LCD and hinge assembly away from the body (which also allows you to remove the plastic plate covering the rear ports).
I did this while the laptop was seated on its side so that I could safely examine the connectors inside:
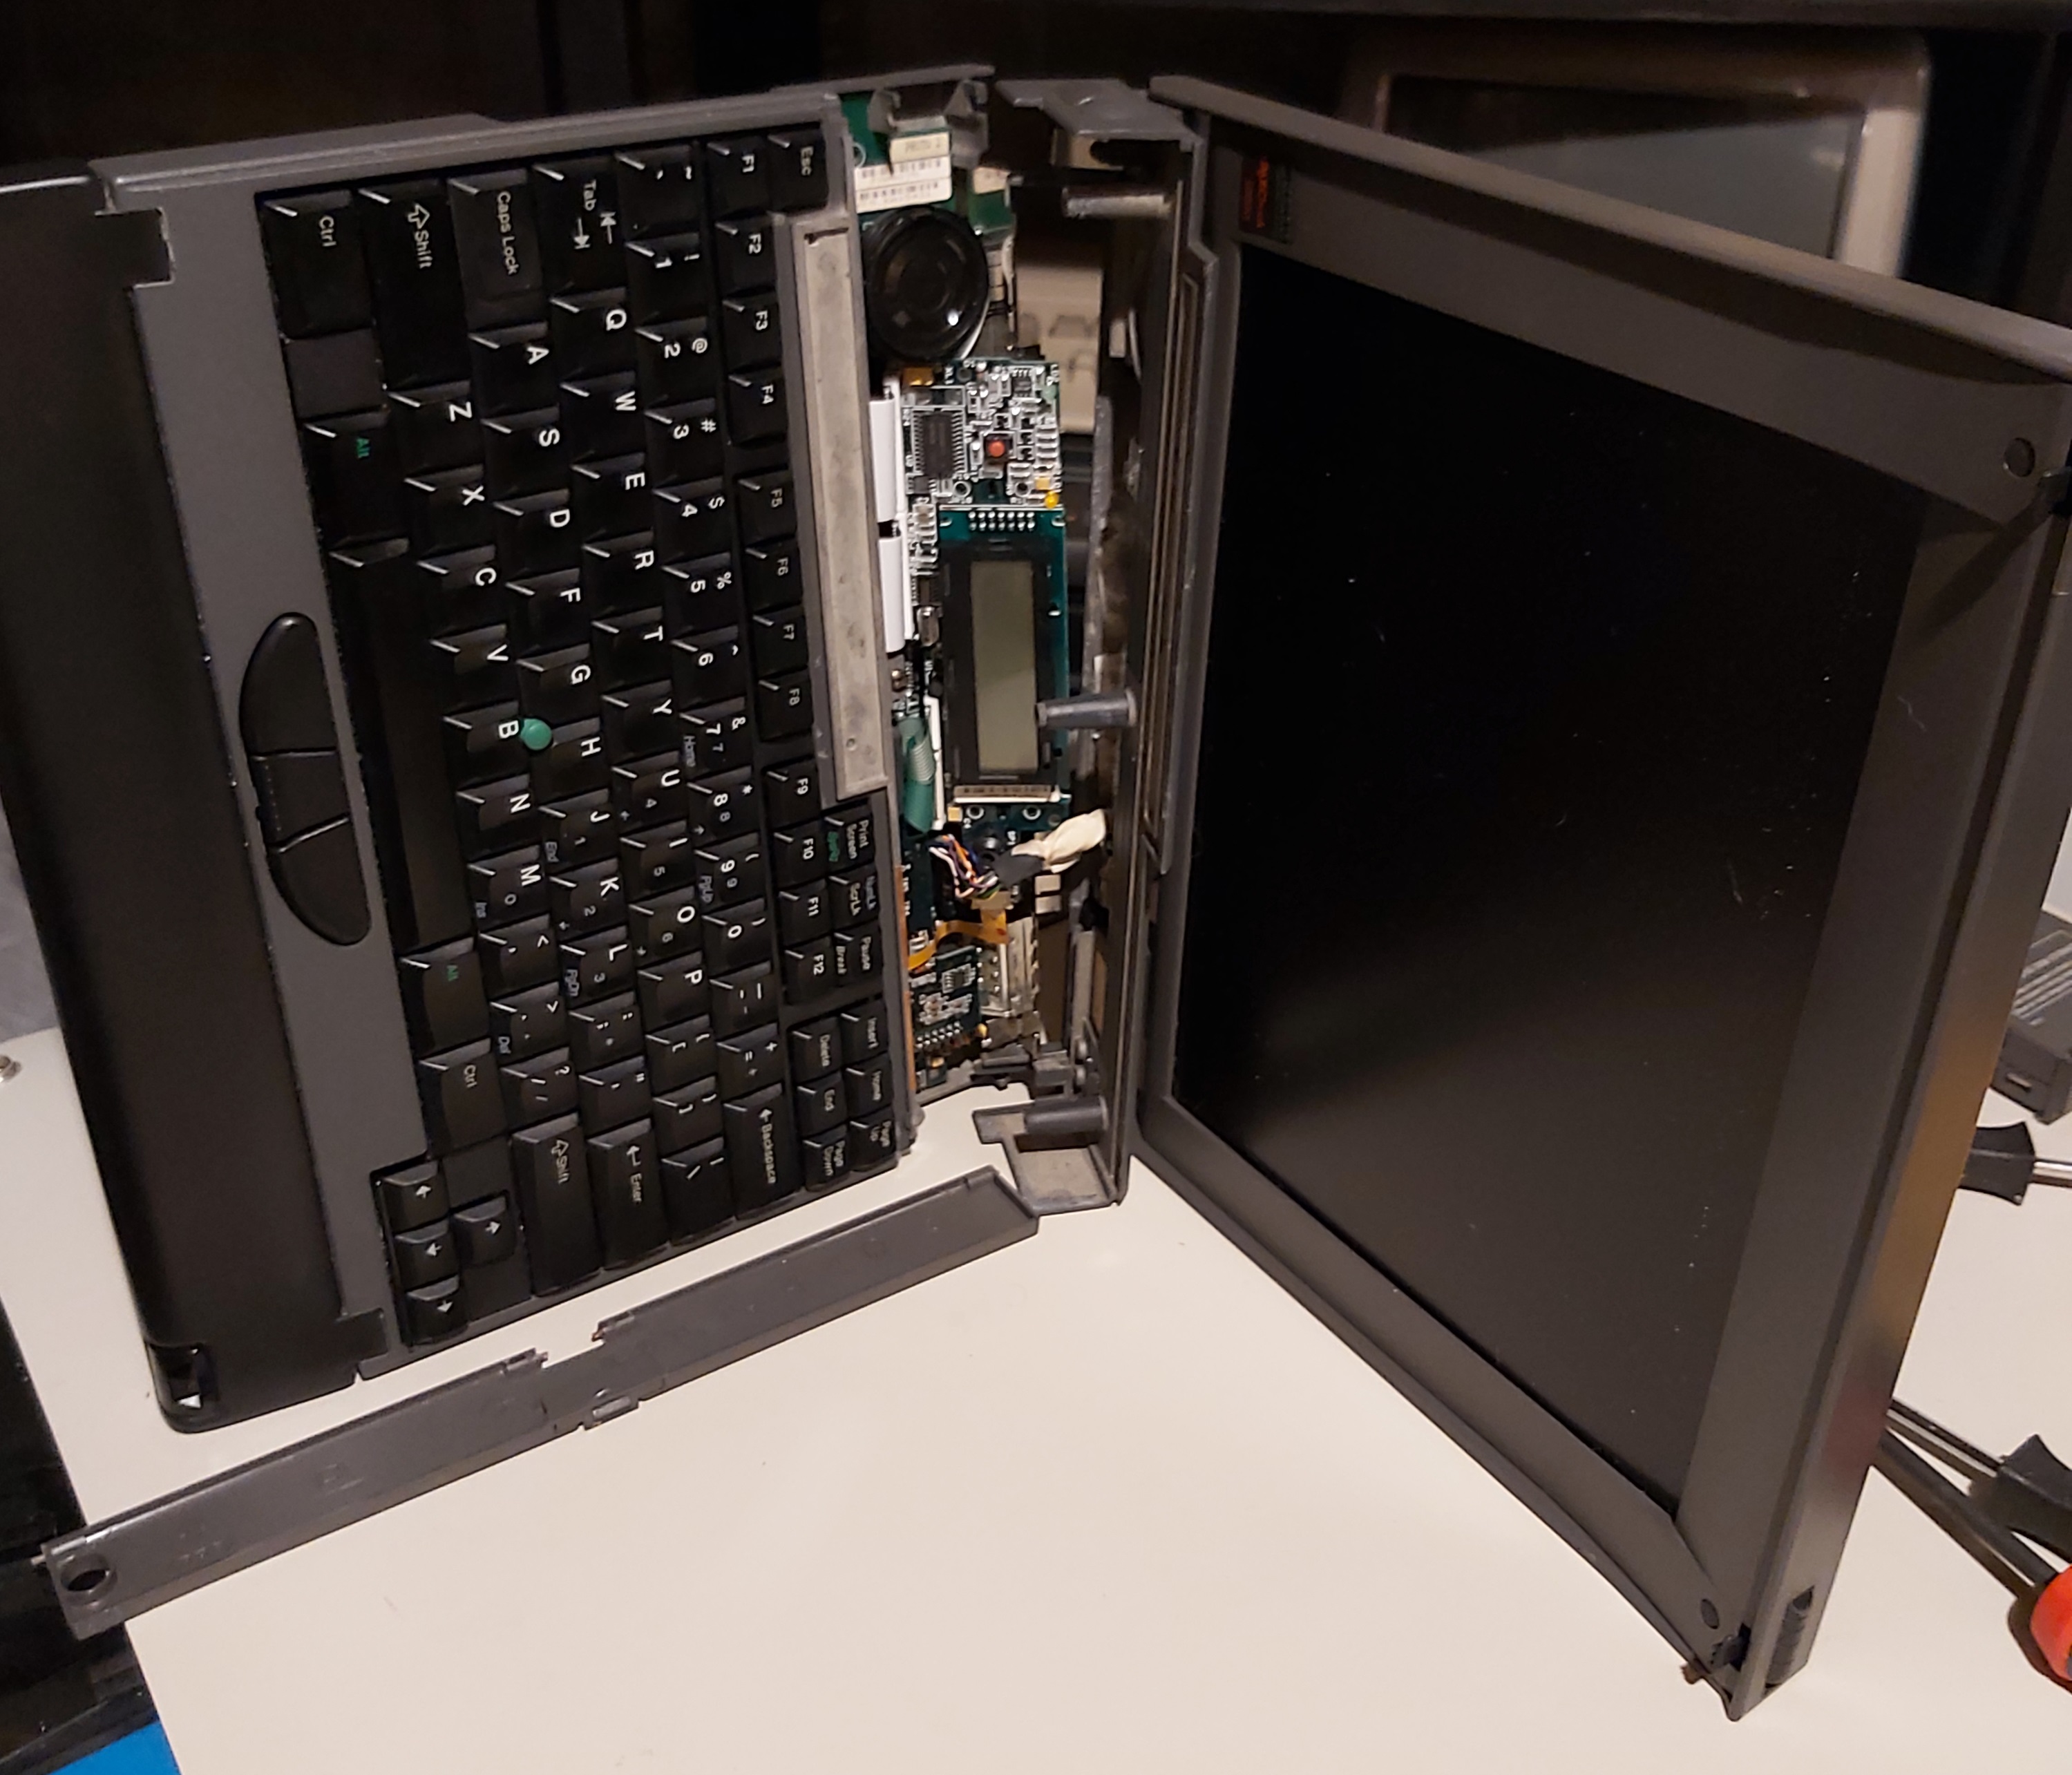
The daughter board holding the LCD status display and red power button switch is what the 3 keyboard ribbon cables connect to. Once those cables are disconnected, you can slide the entire top assembly (including keyboard and hand rest) forward and remove it. The underside of the Thinkpad keyboard indicates that is a Key Tronic UO4056US. Key Tronic bought Lexmark’s tooling after they exited the keyboard business in early 1996 and continued making laptop keyboards for IBM… and Tadpole.
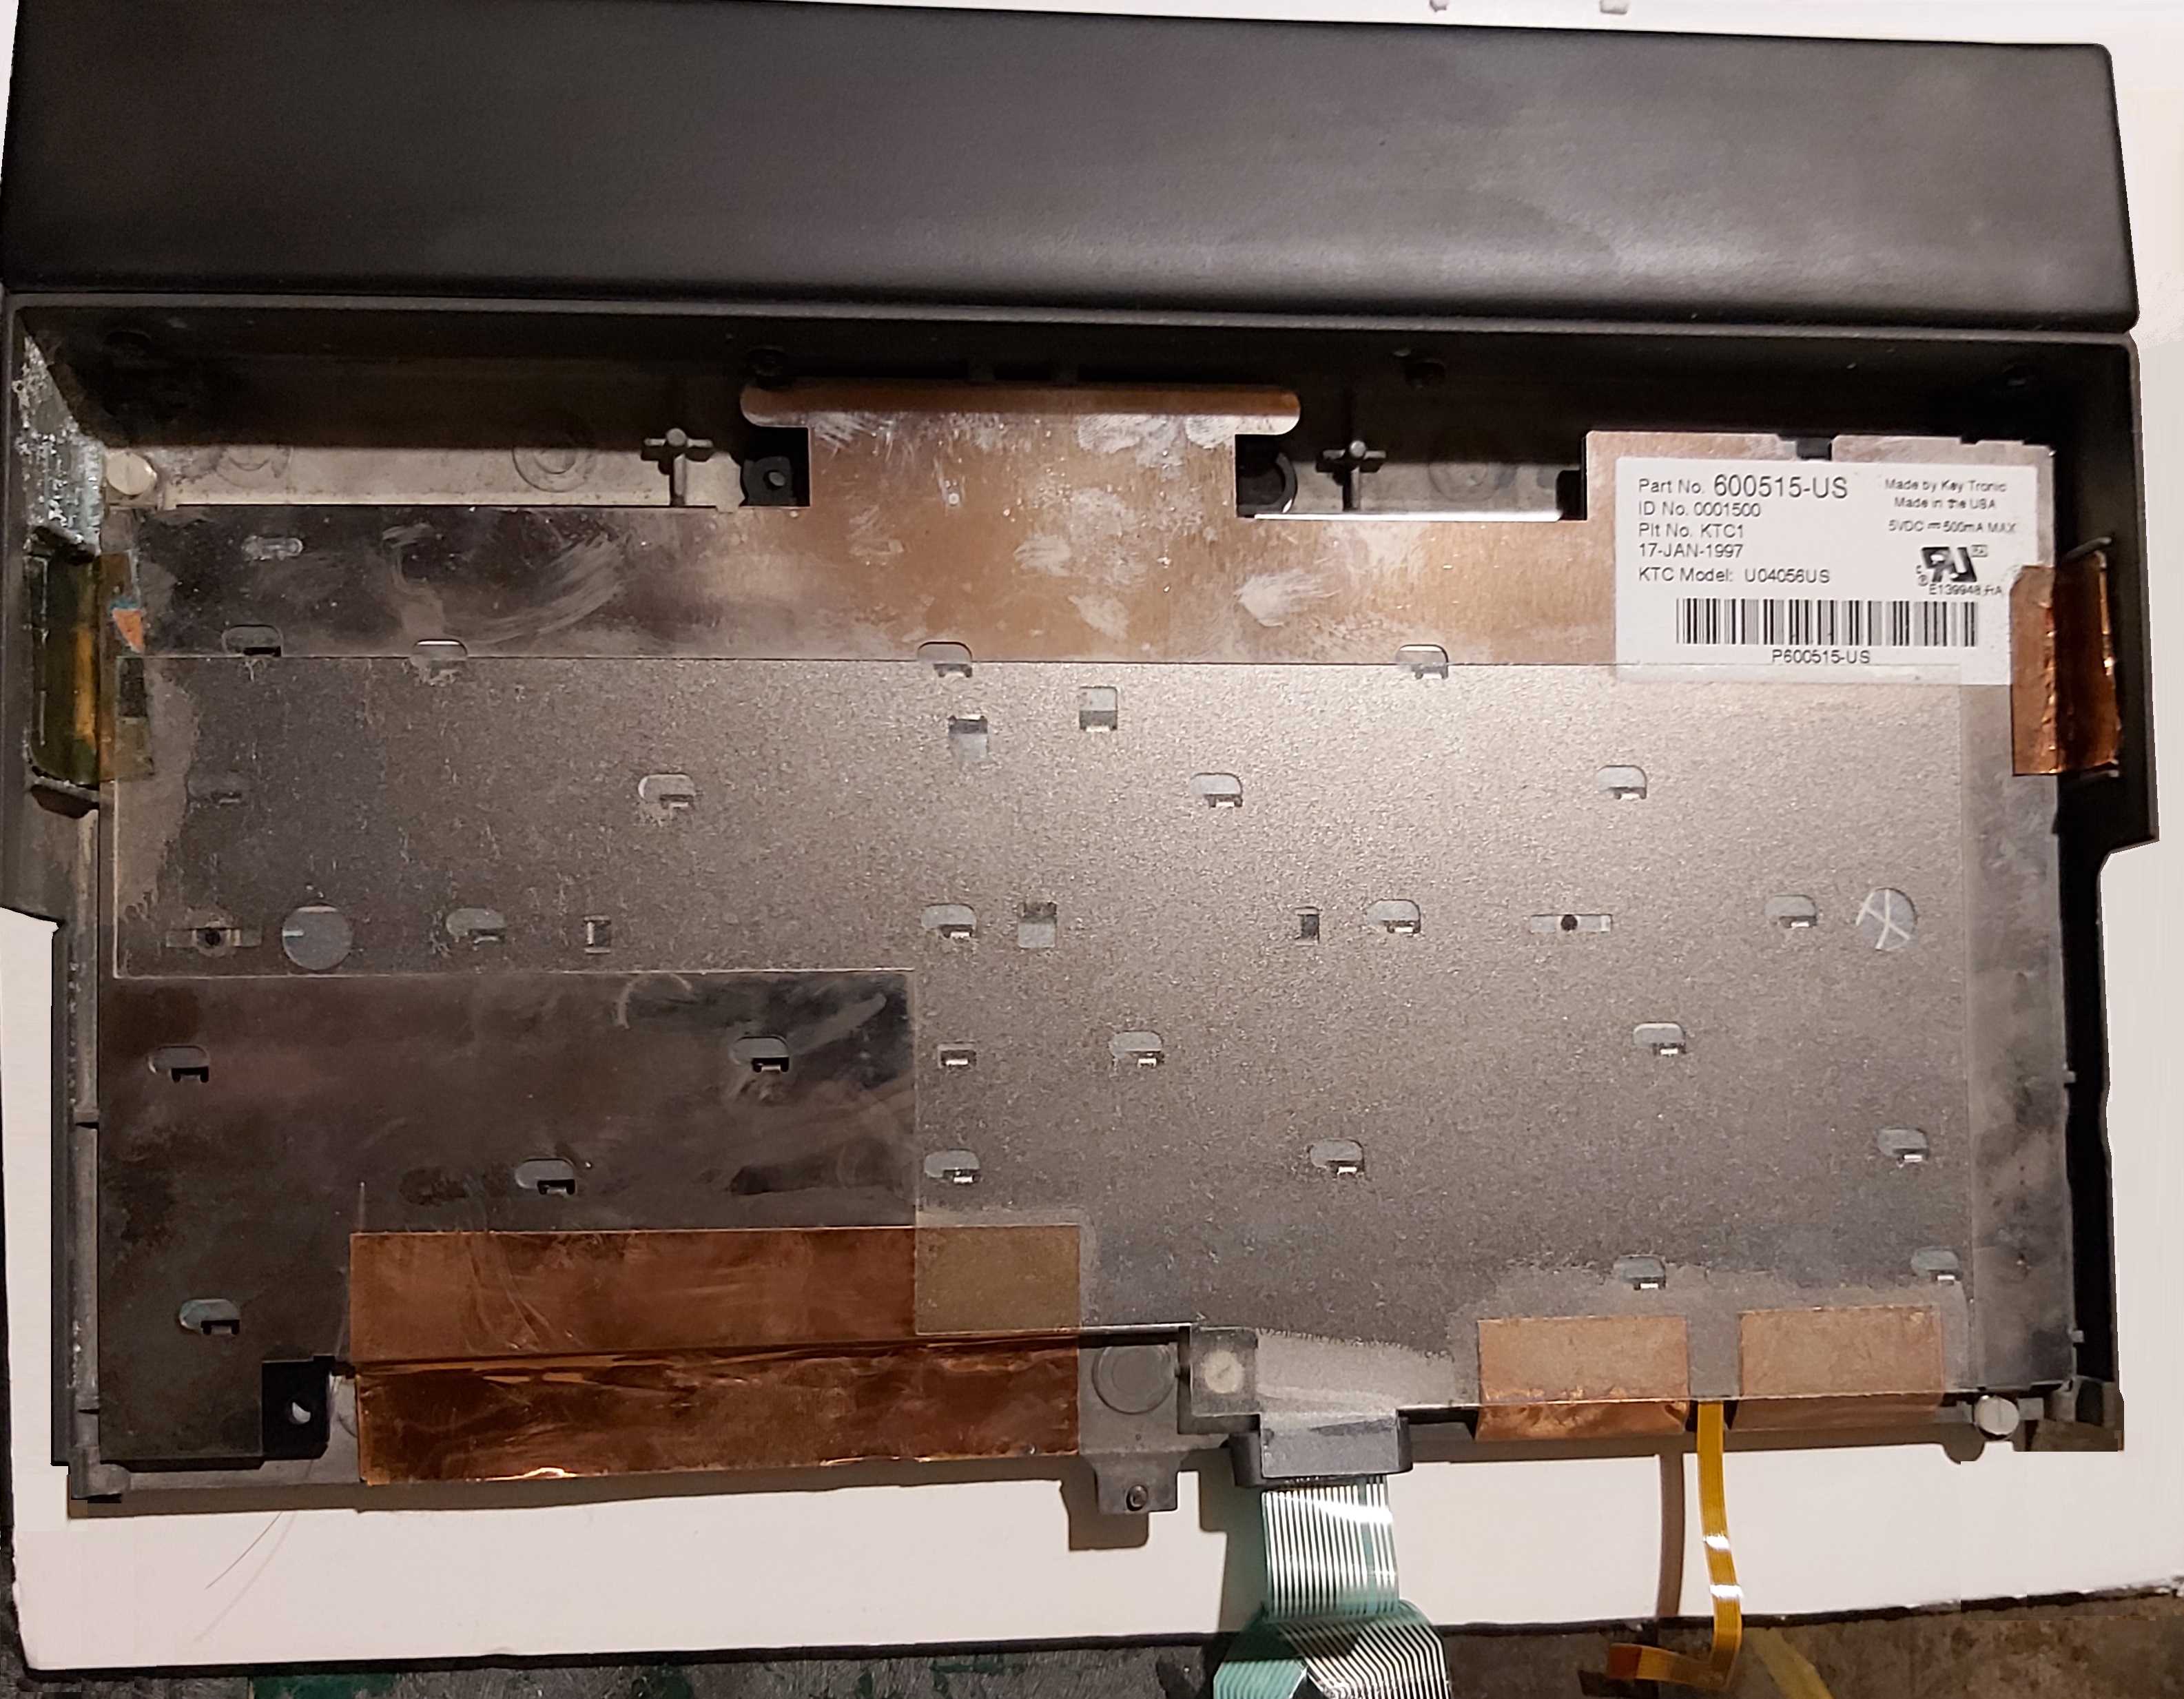
This also allowed me to easily clean up the battery leakage shown upper left.
With the top assembly removed, the internal components are easily accessible:
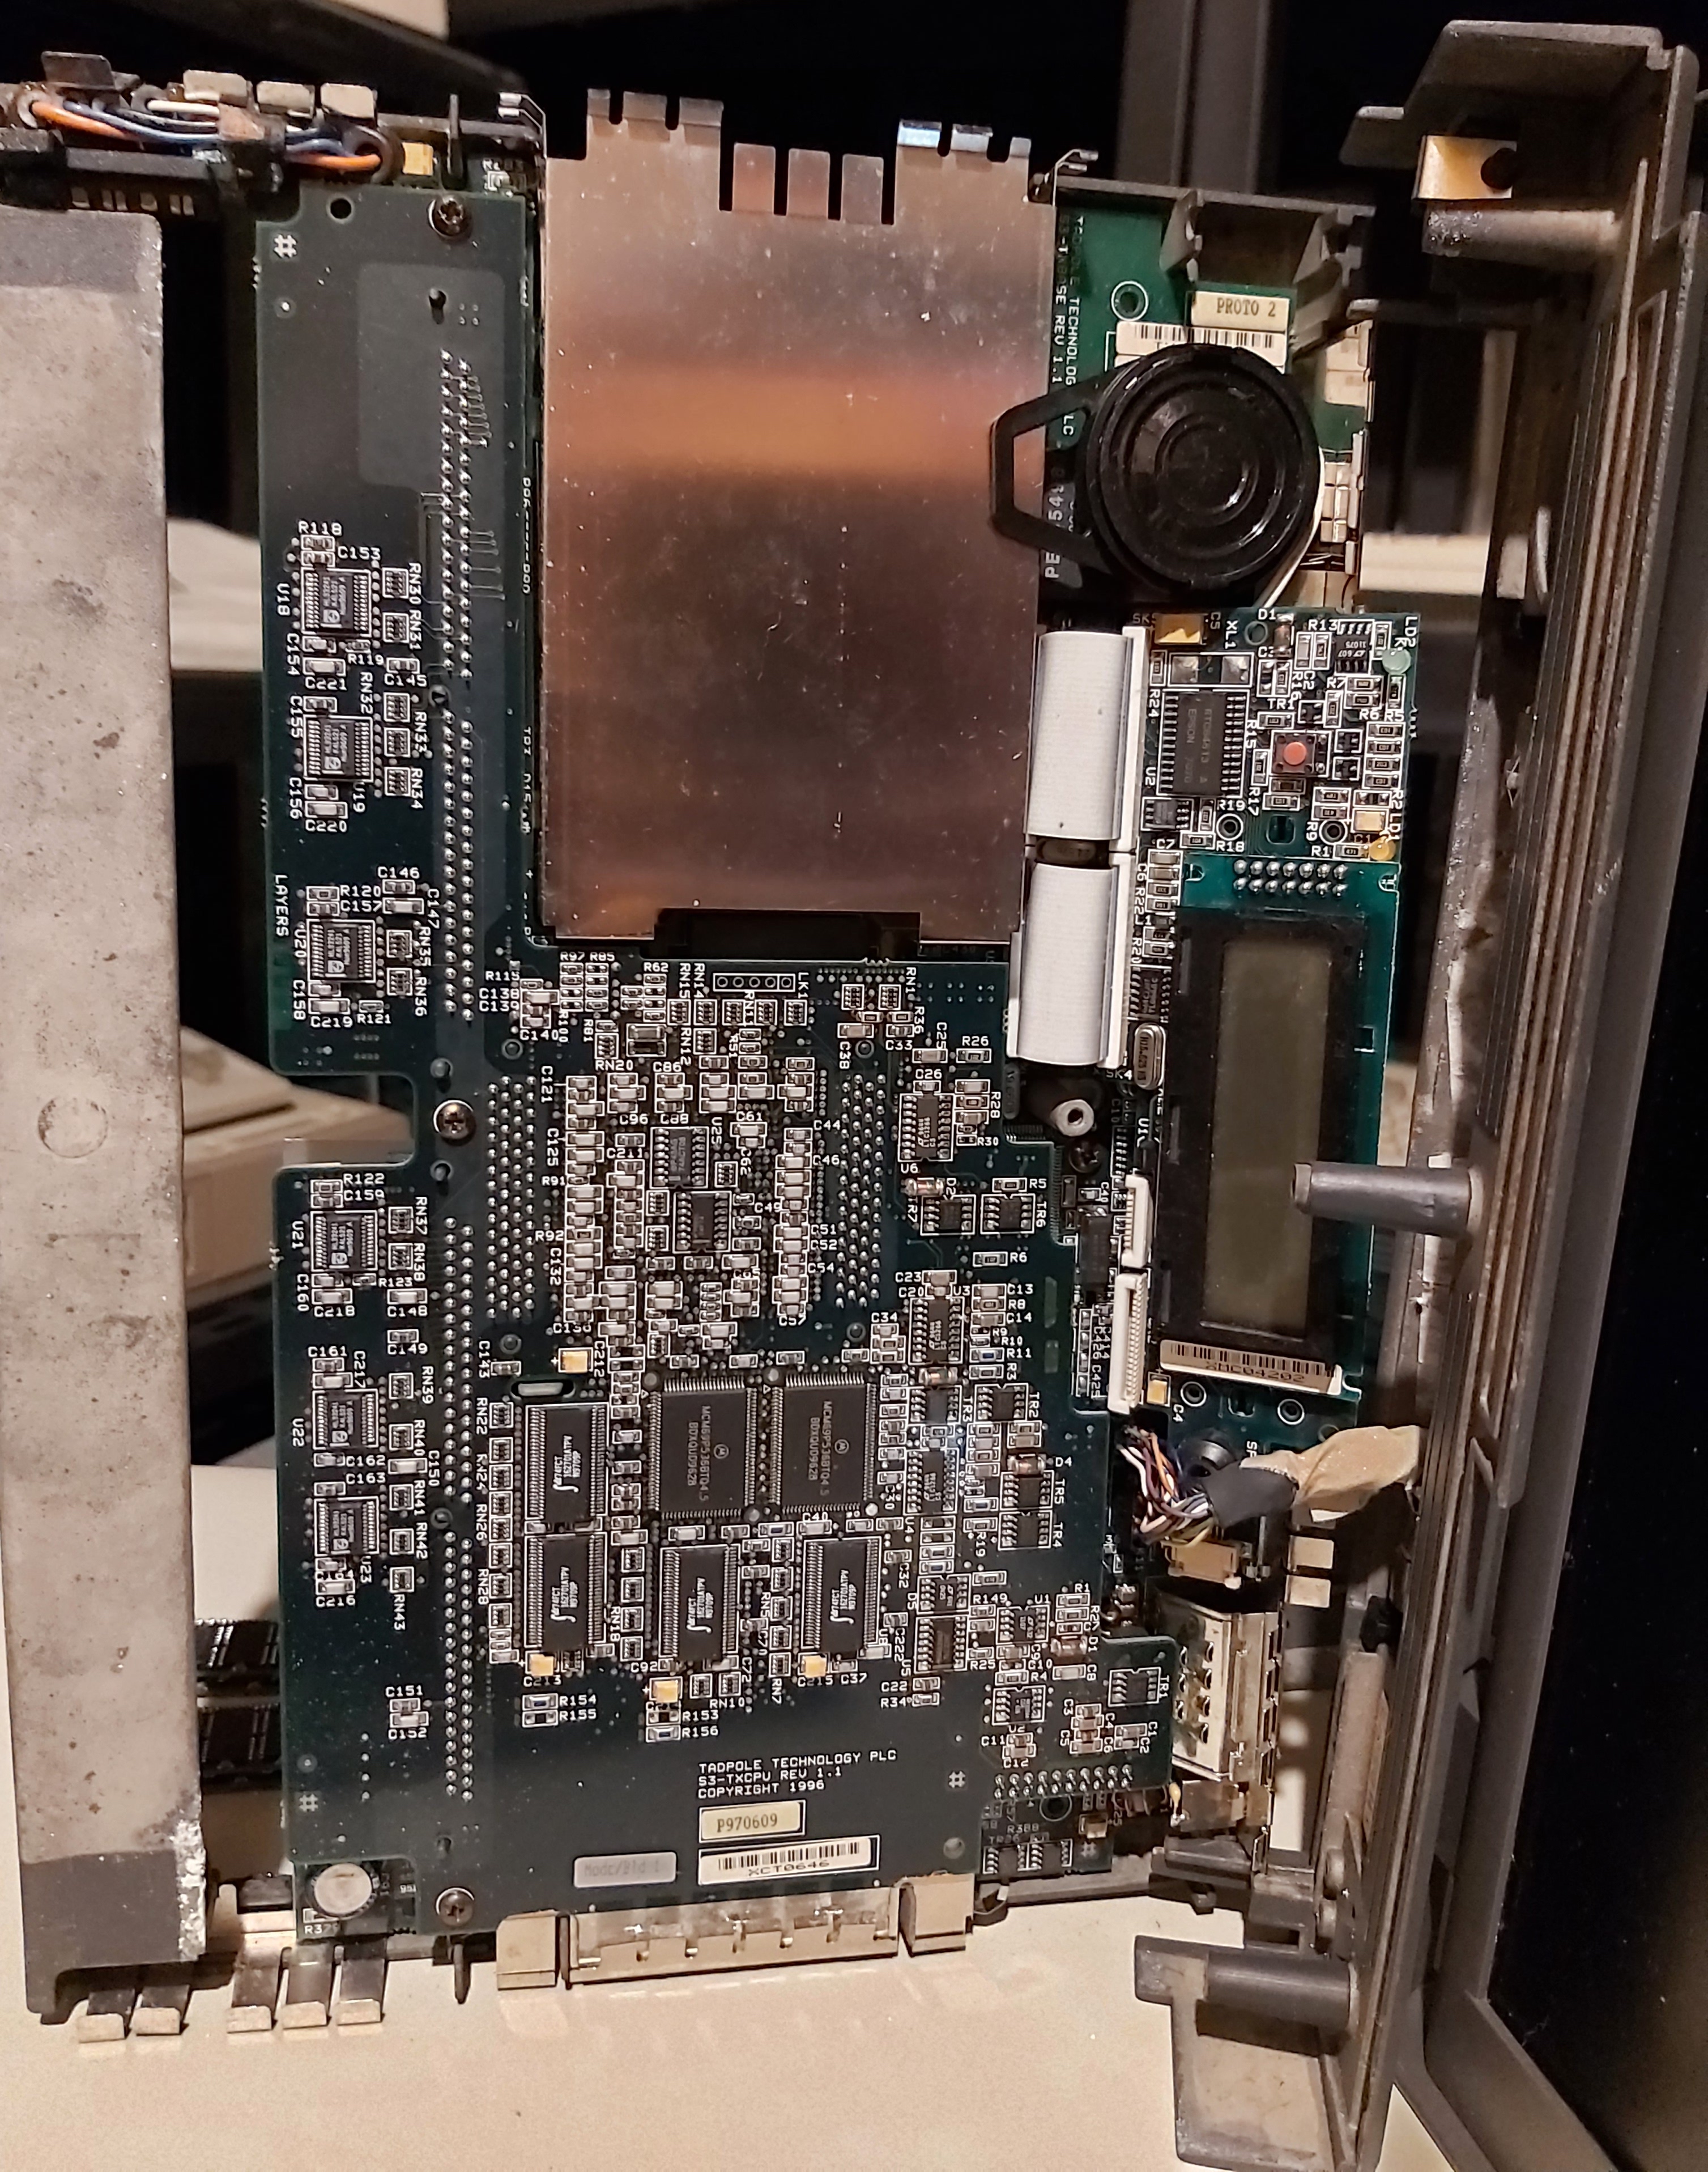
The daughter board is connected to the motherboard via 2 white ribbon cables. After disconnecting the cables, you can unsnap the daughter board from its plastic stand and remove it. The small speaker also rests on a small plastic stand - once you unsnap the stand from the motherboard and disconnect the speaker cable from the underlying connector, you can remove it as well. Next, you can remove the 2 pin header connectors for the LCD display panel and set the entire LCD assembly aside.
There are two main circuit boards in the SPARCbook that are sandwiched together:
- The motherboard, which is affixed to the bottom of the laptop, and
- The CPU board, which plugs into the motherboard via 2 custom SCA-style connectors.
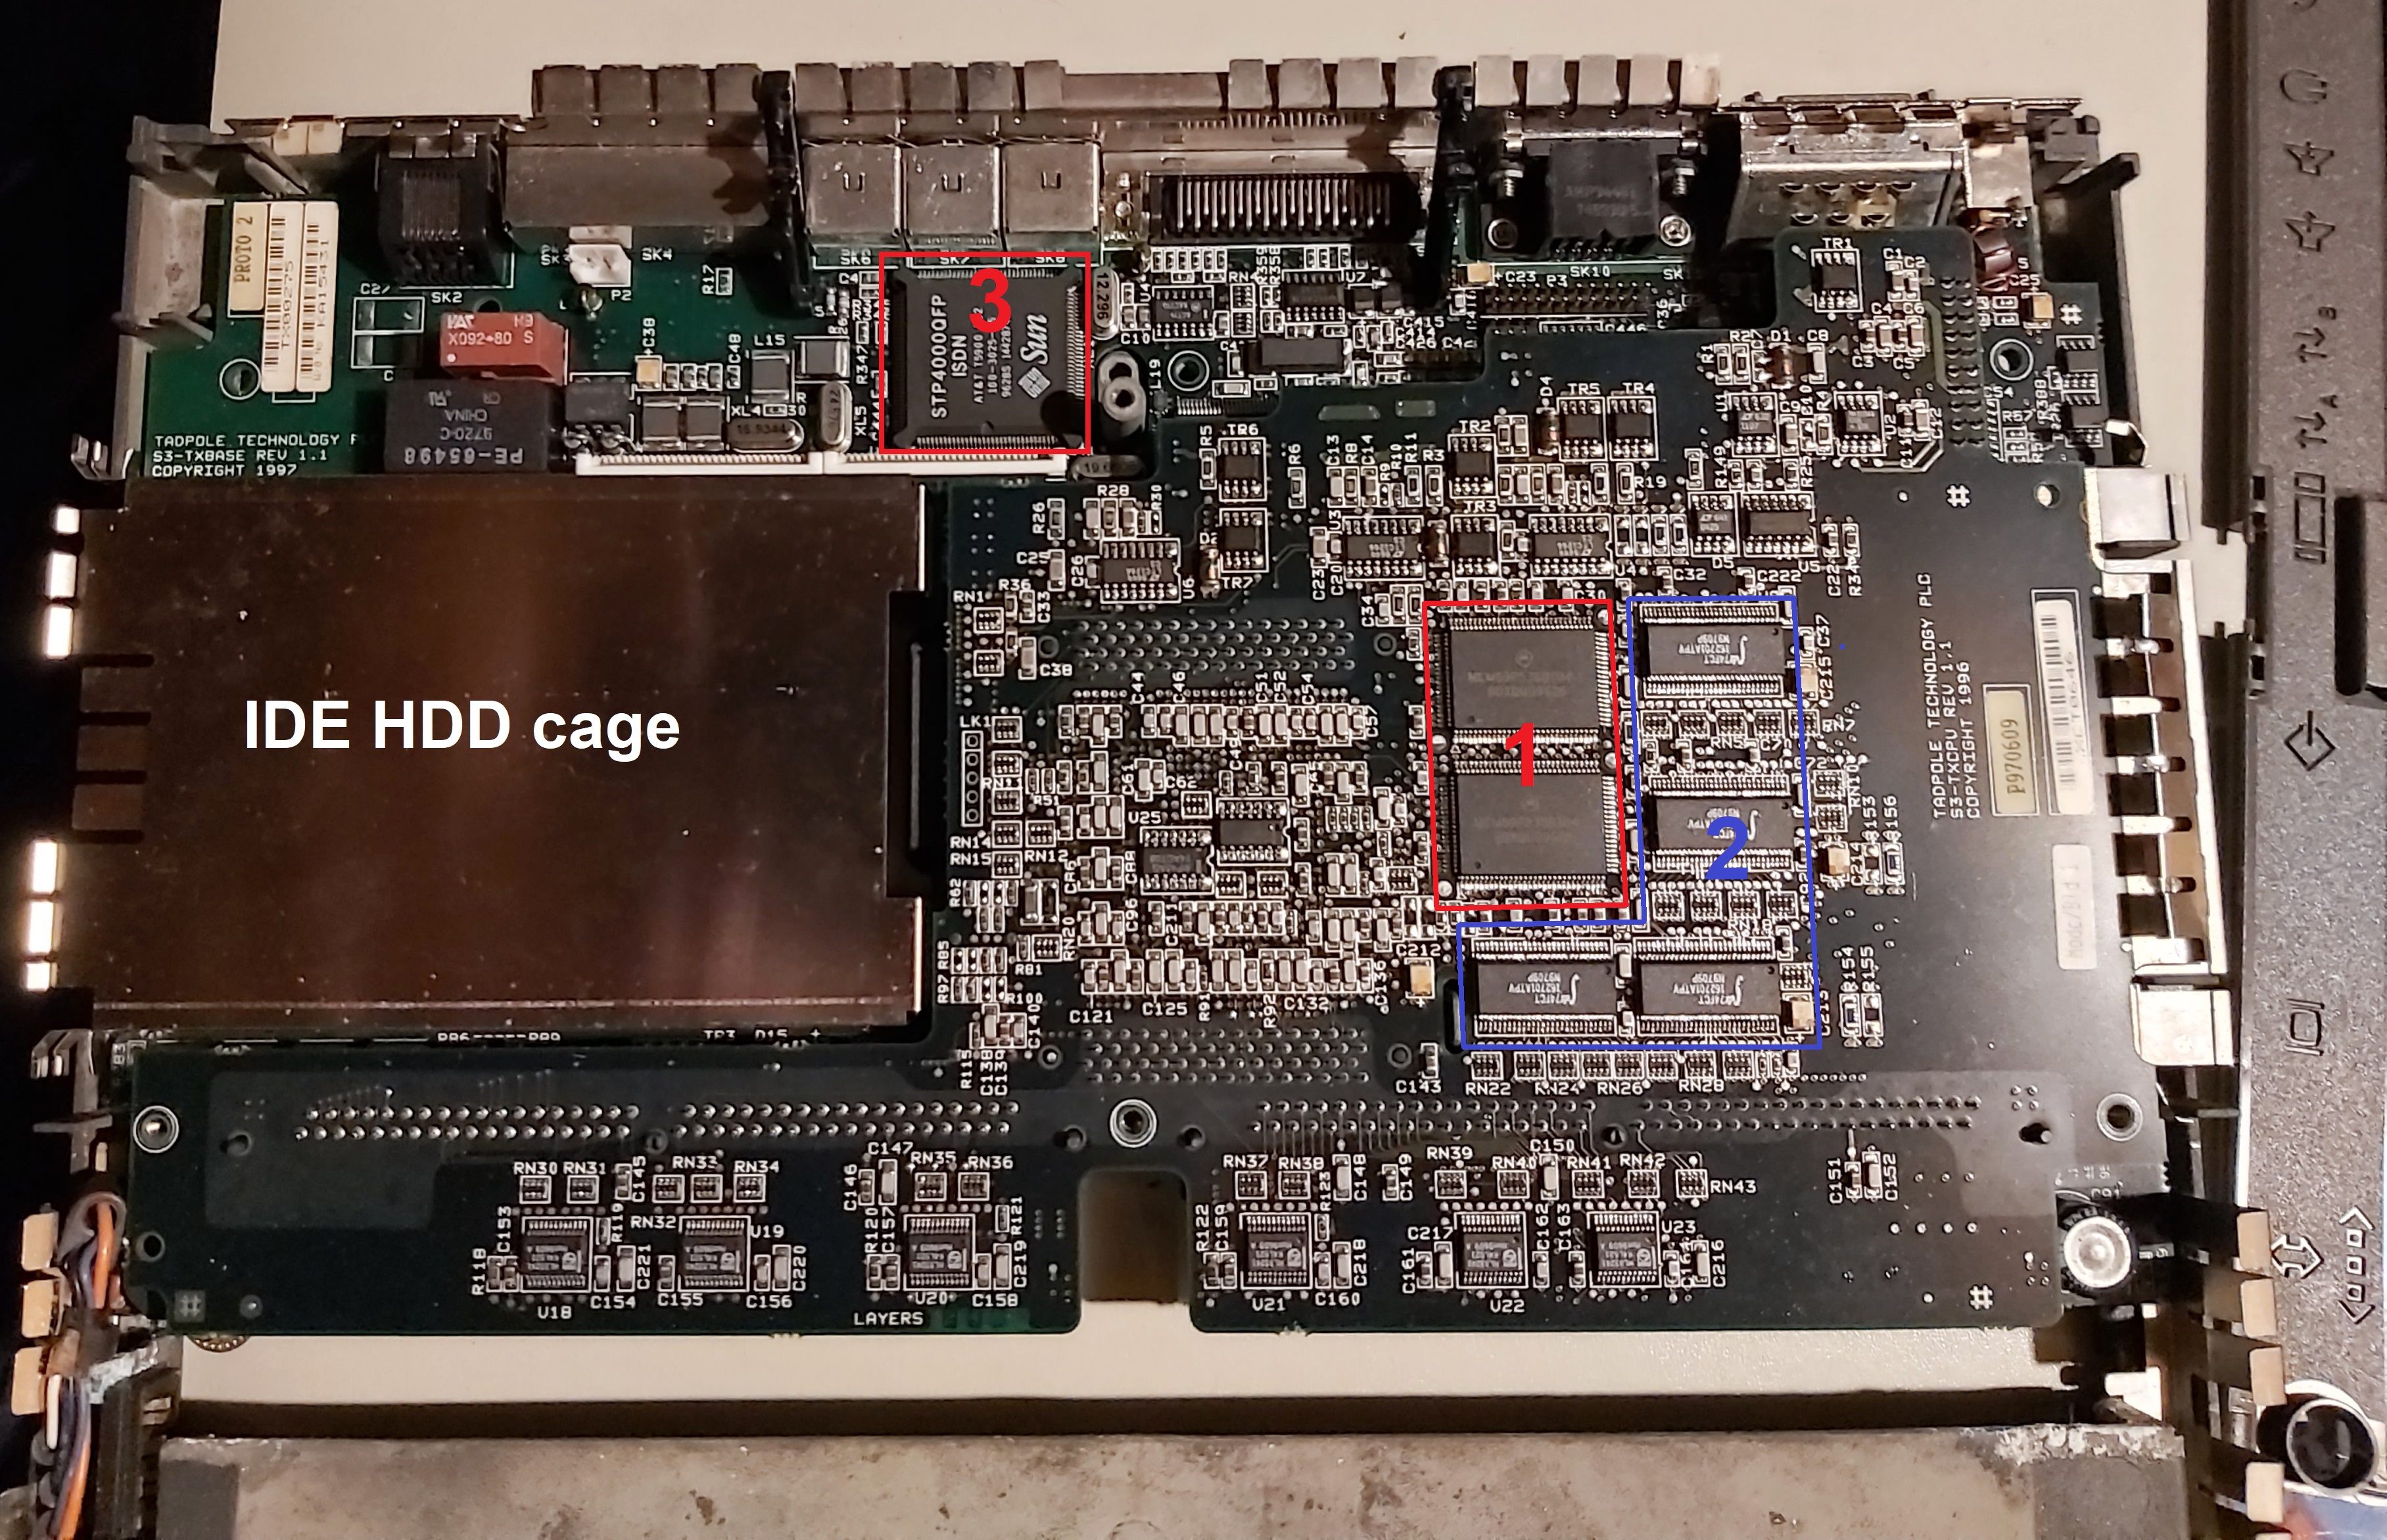
In the following picture, you can see the cache RAM (1) and bus transceivers (2) on the CPU board, as well as the Sun-branded ISDN controller (3) on the underlying motherboard:
Removing 3 screws from the CPU board allows you to unplug it from the motherboard. The reverse of the CPU board contains the CPU (4) as well as the two RAM slots (5) that accept 60ns SIMMs (I removed the 2 SIMMs before teardown as they are accessible from the battery compartment):
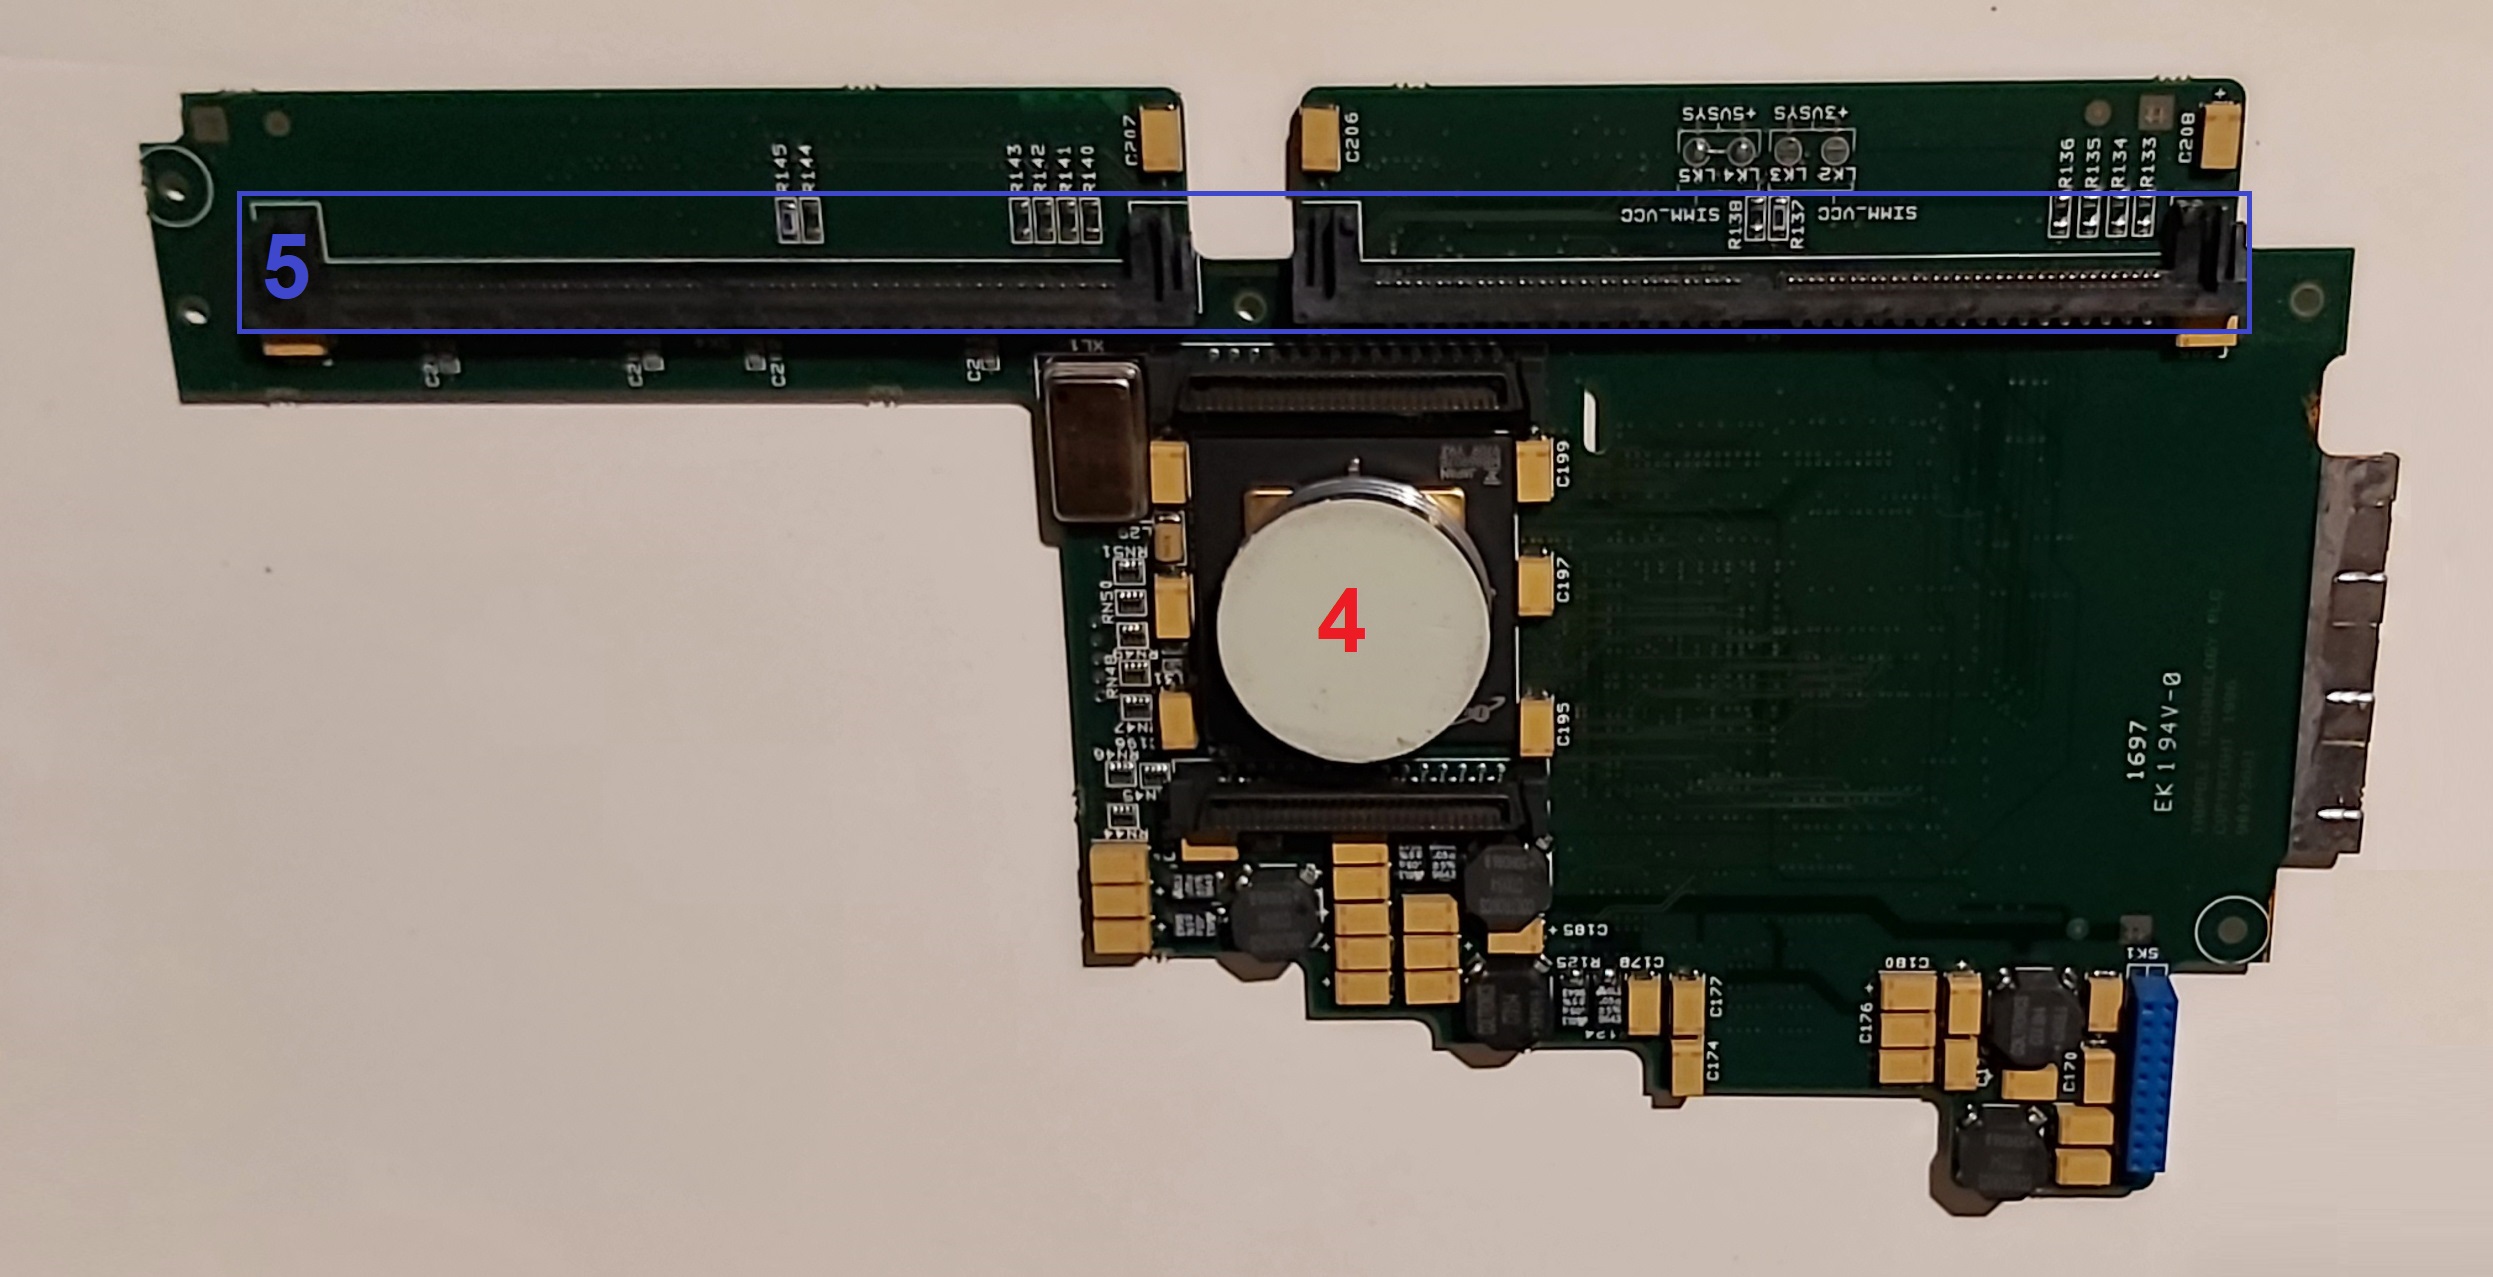
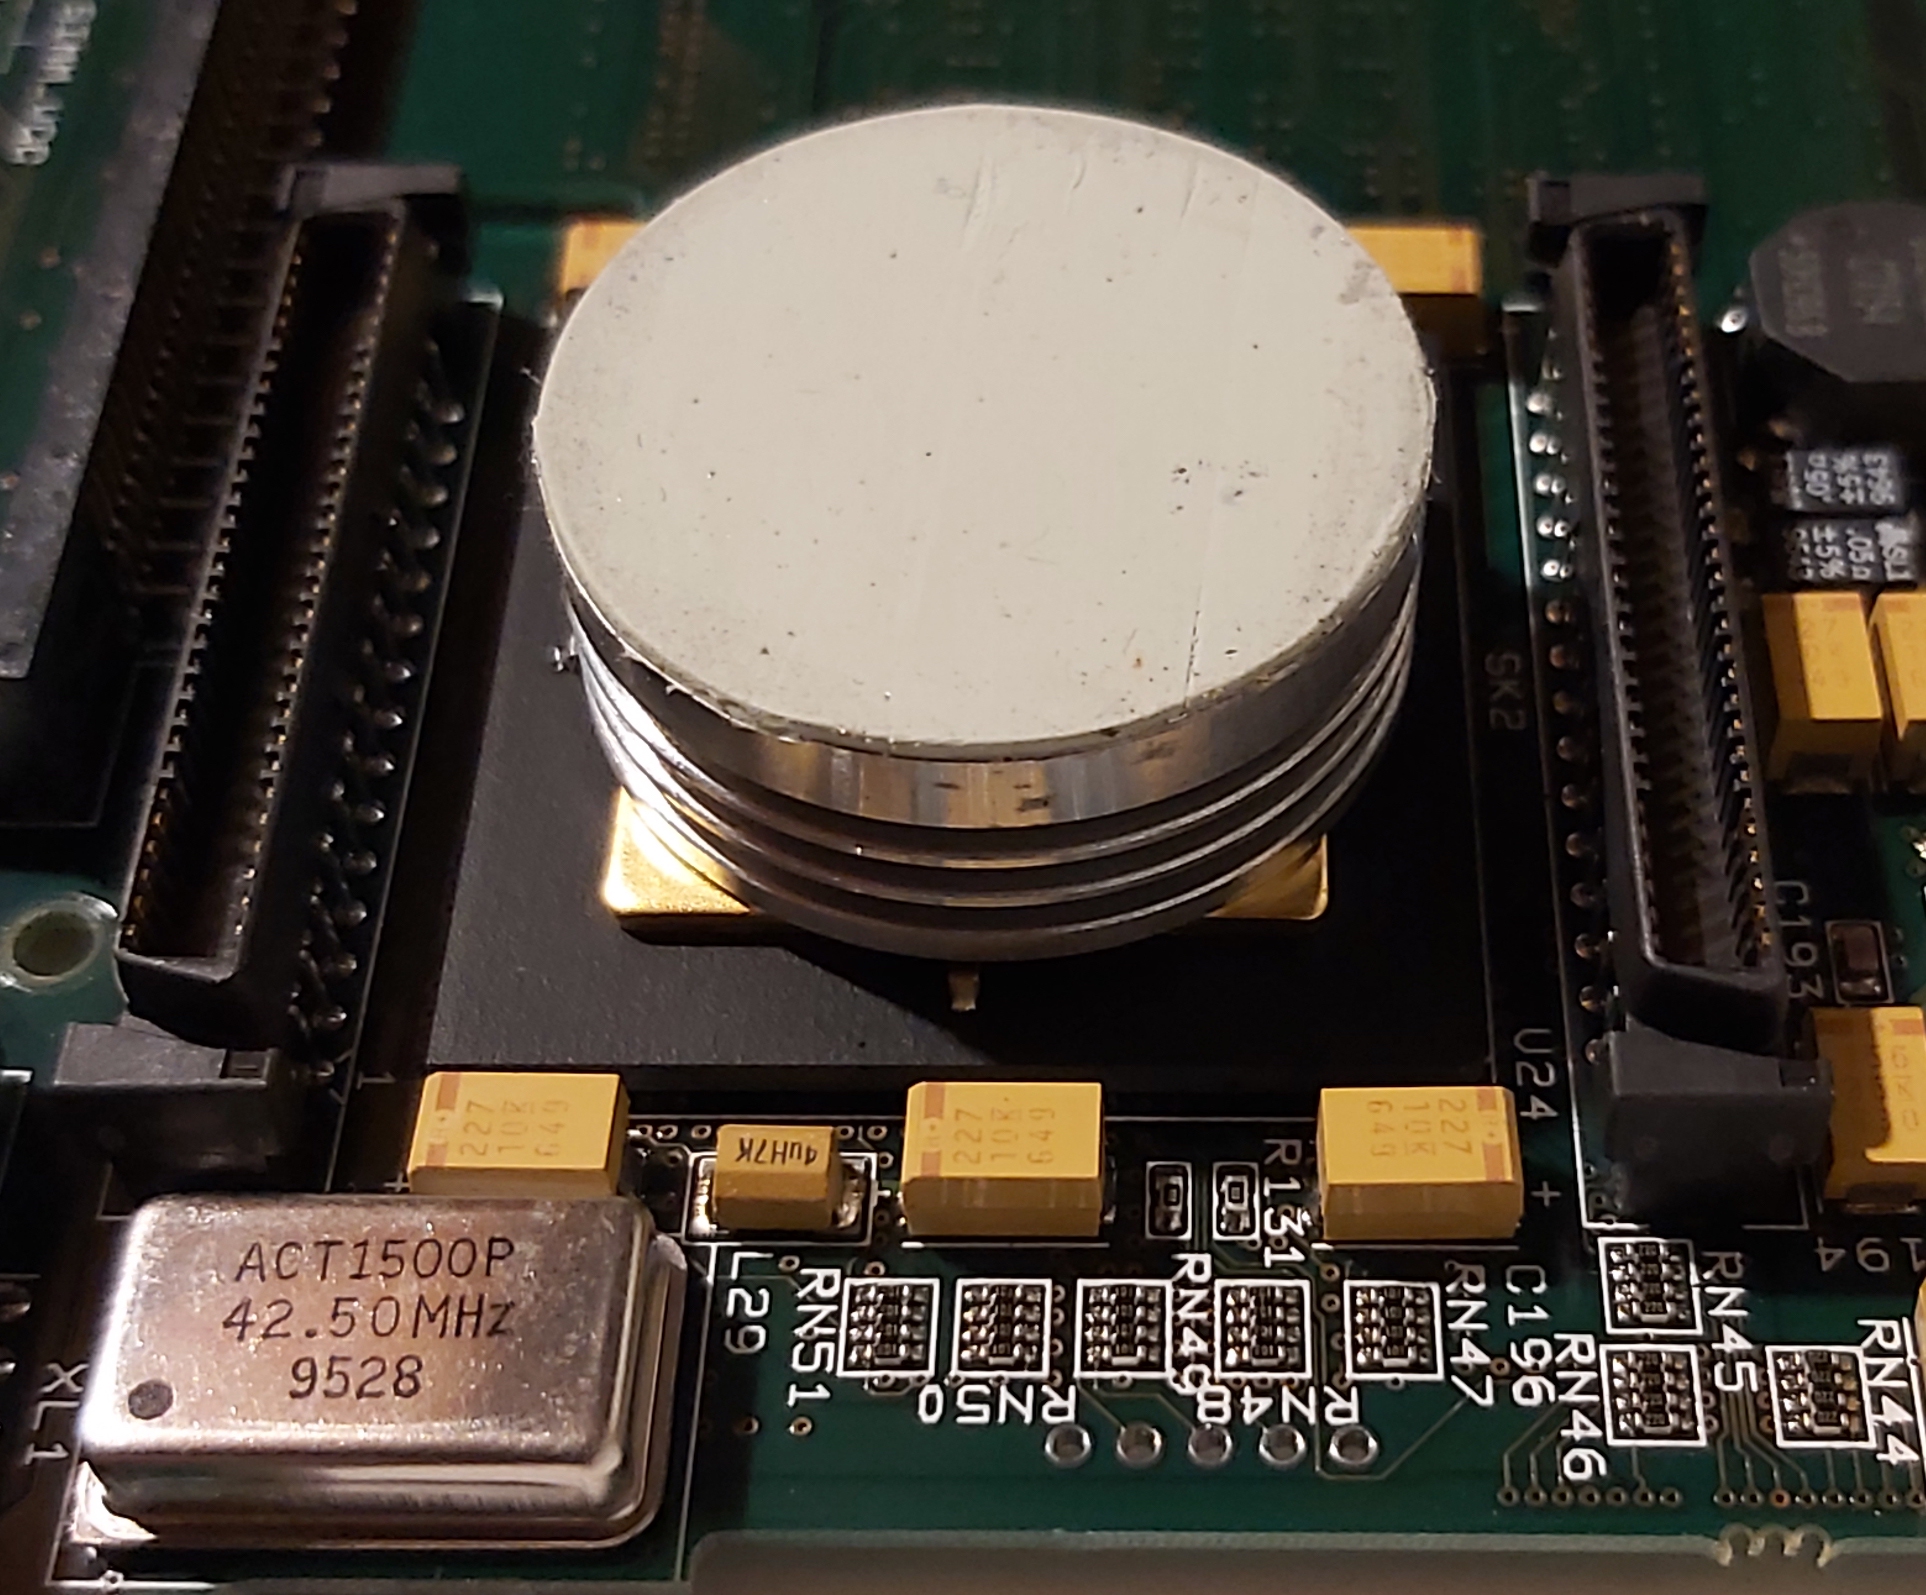
The 170MHz TurboSPARC CPU has a gold heat spreader with a heatsink firmly glued on. The top of the heatsink has a thermal pad that touches the laptop base for heat dissipation:
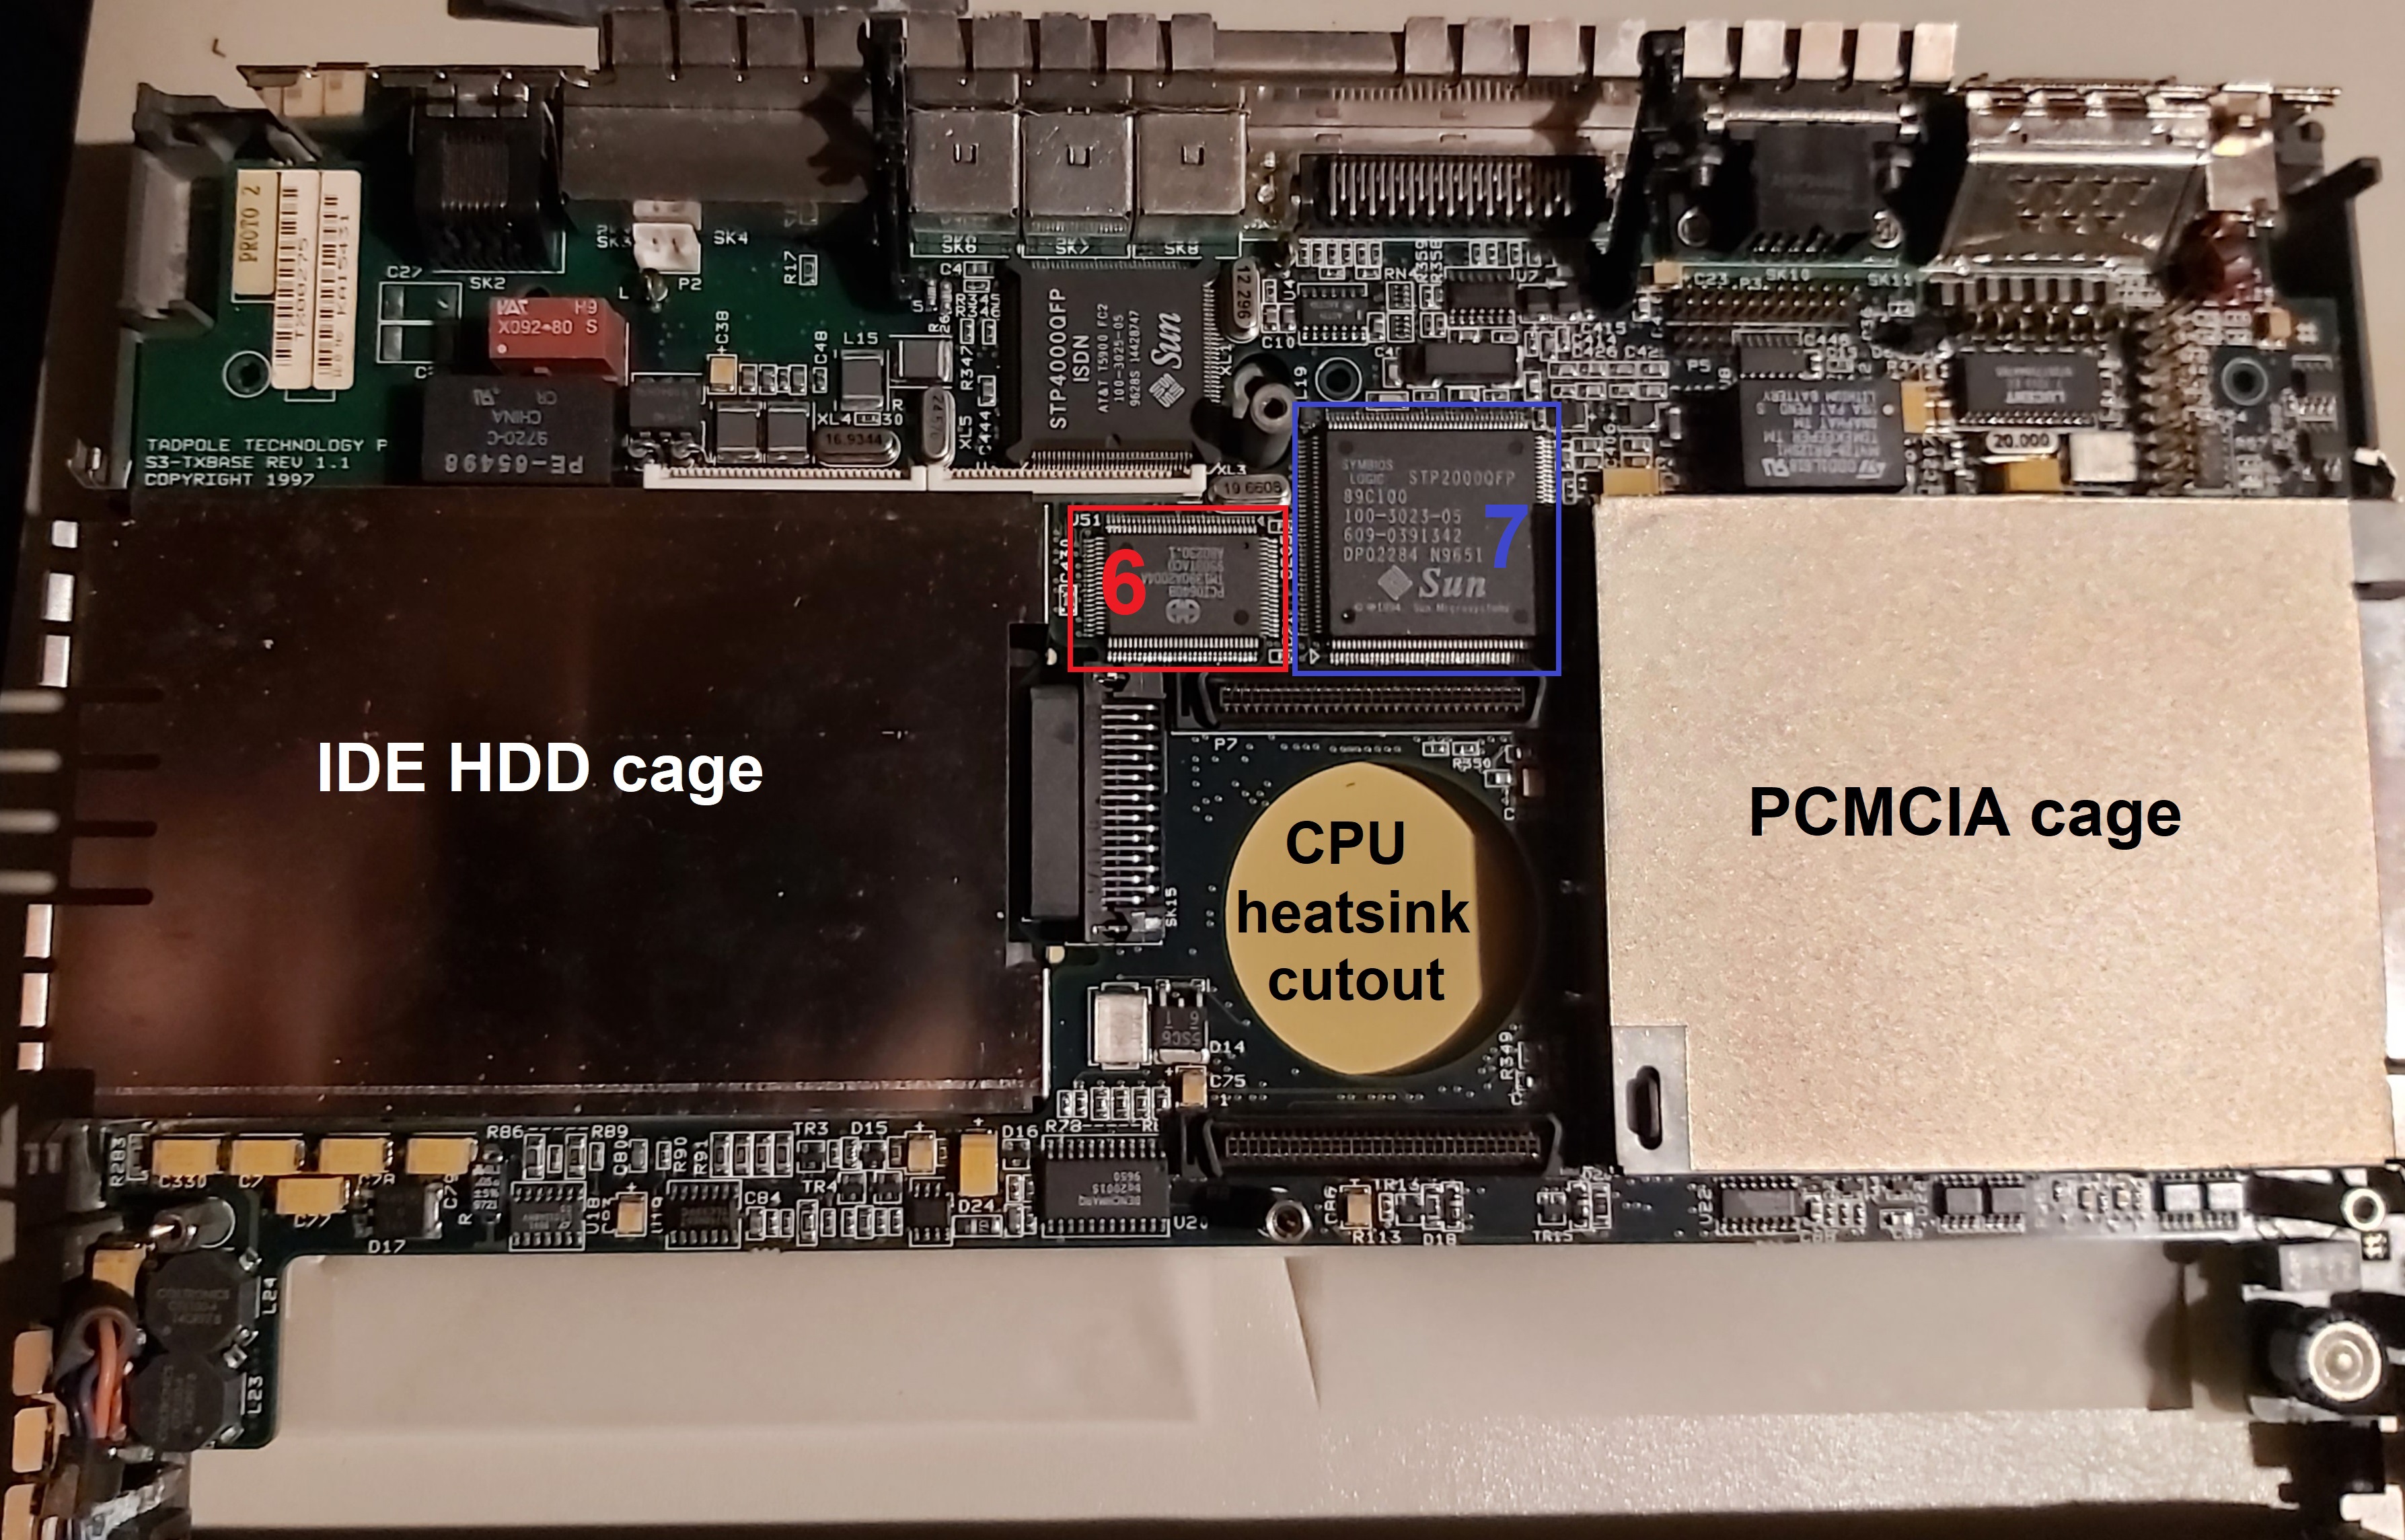
With the CPU board removed, you can see the rest of the motherboard. In addition to the Sun-branded ISDN controller shown earlier, there is an IDE controller (6) and another Sun-branded controller that provides Ethernet/SCSI/parallel (7). There’s also a round cutout to allow the CPU heatsink to reach the yellow thermal pad affixed directly to the magnesium alloy base of the laptop:
If you remove one more screw, as well as the 3 riser screws, you can lift the motherboard away from the bottom of the laptop.
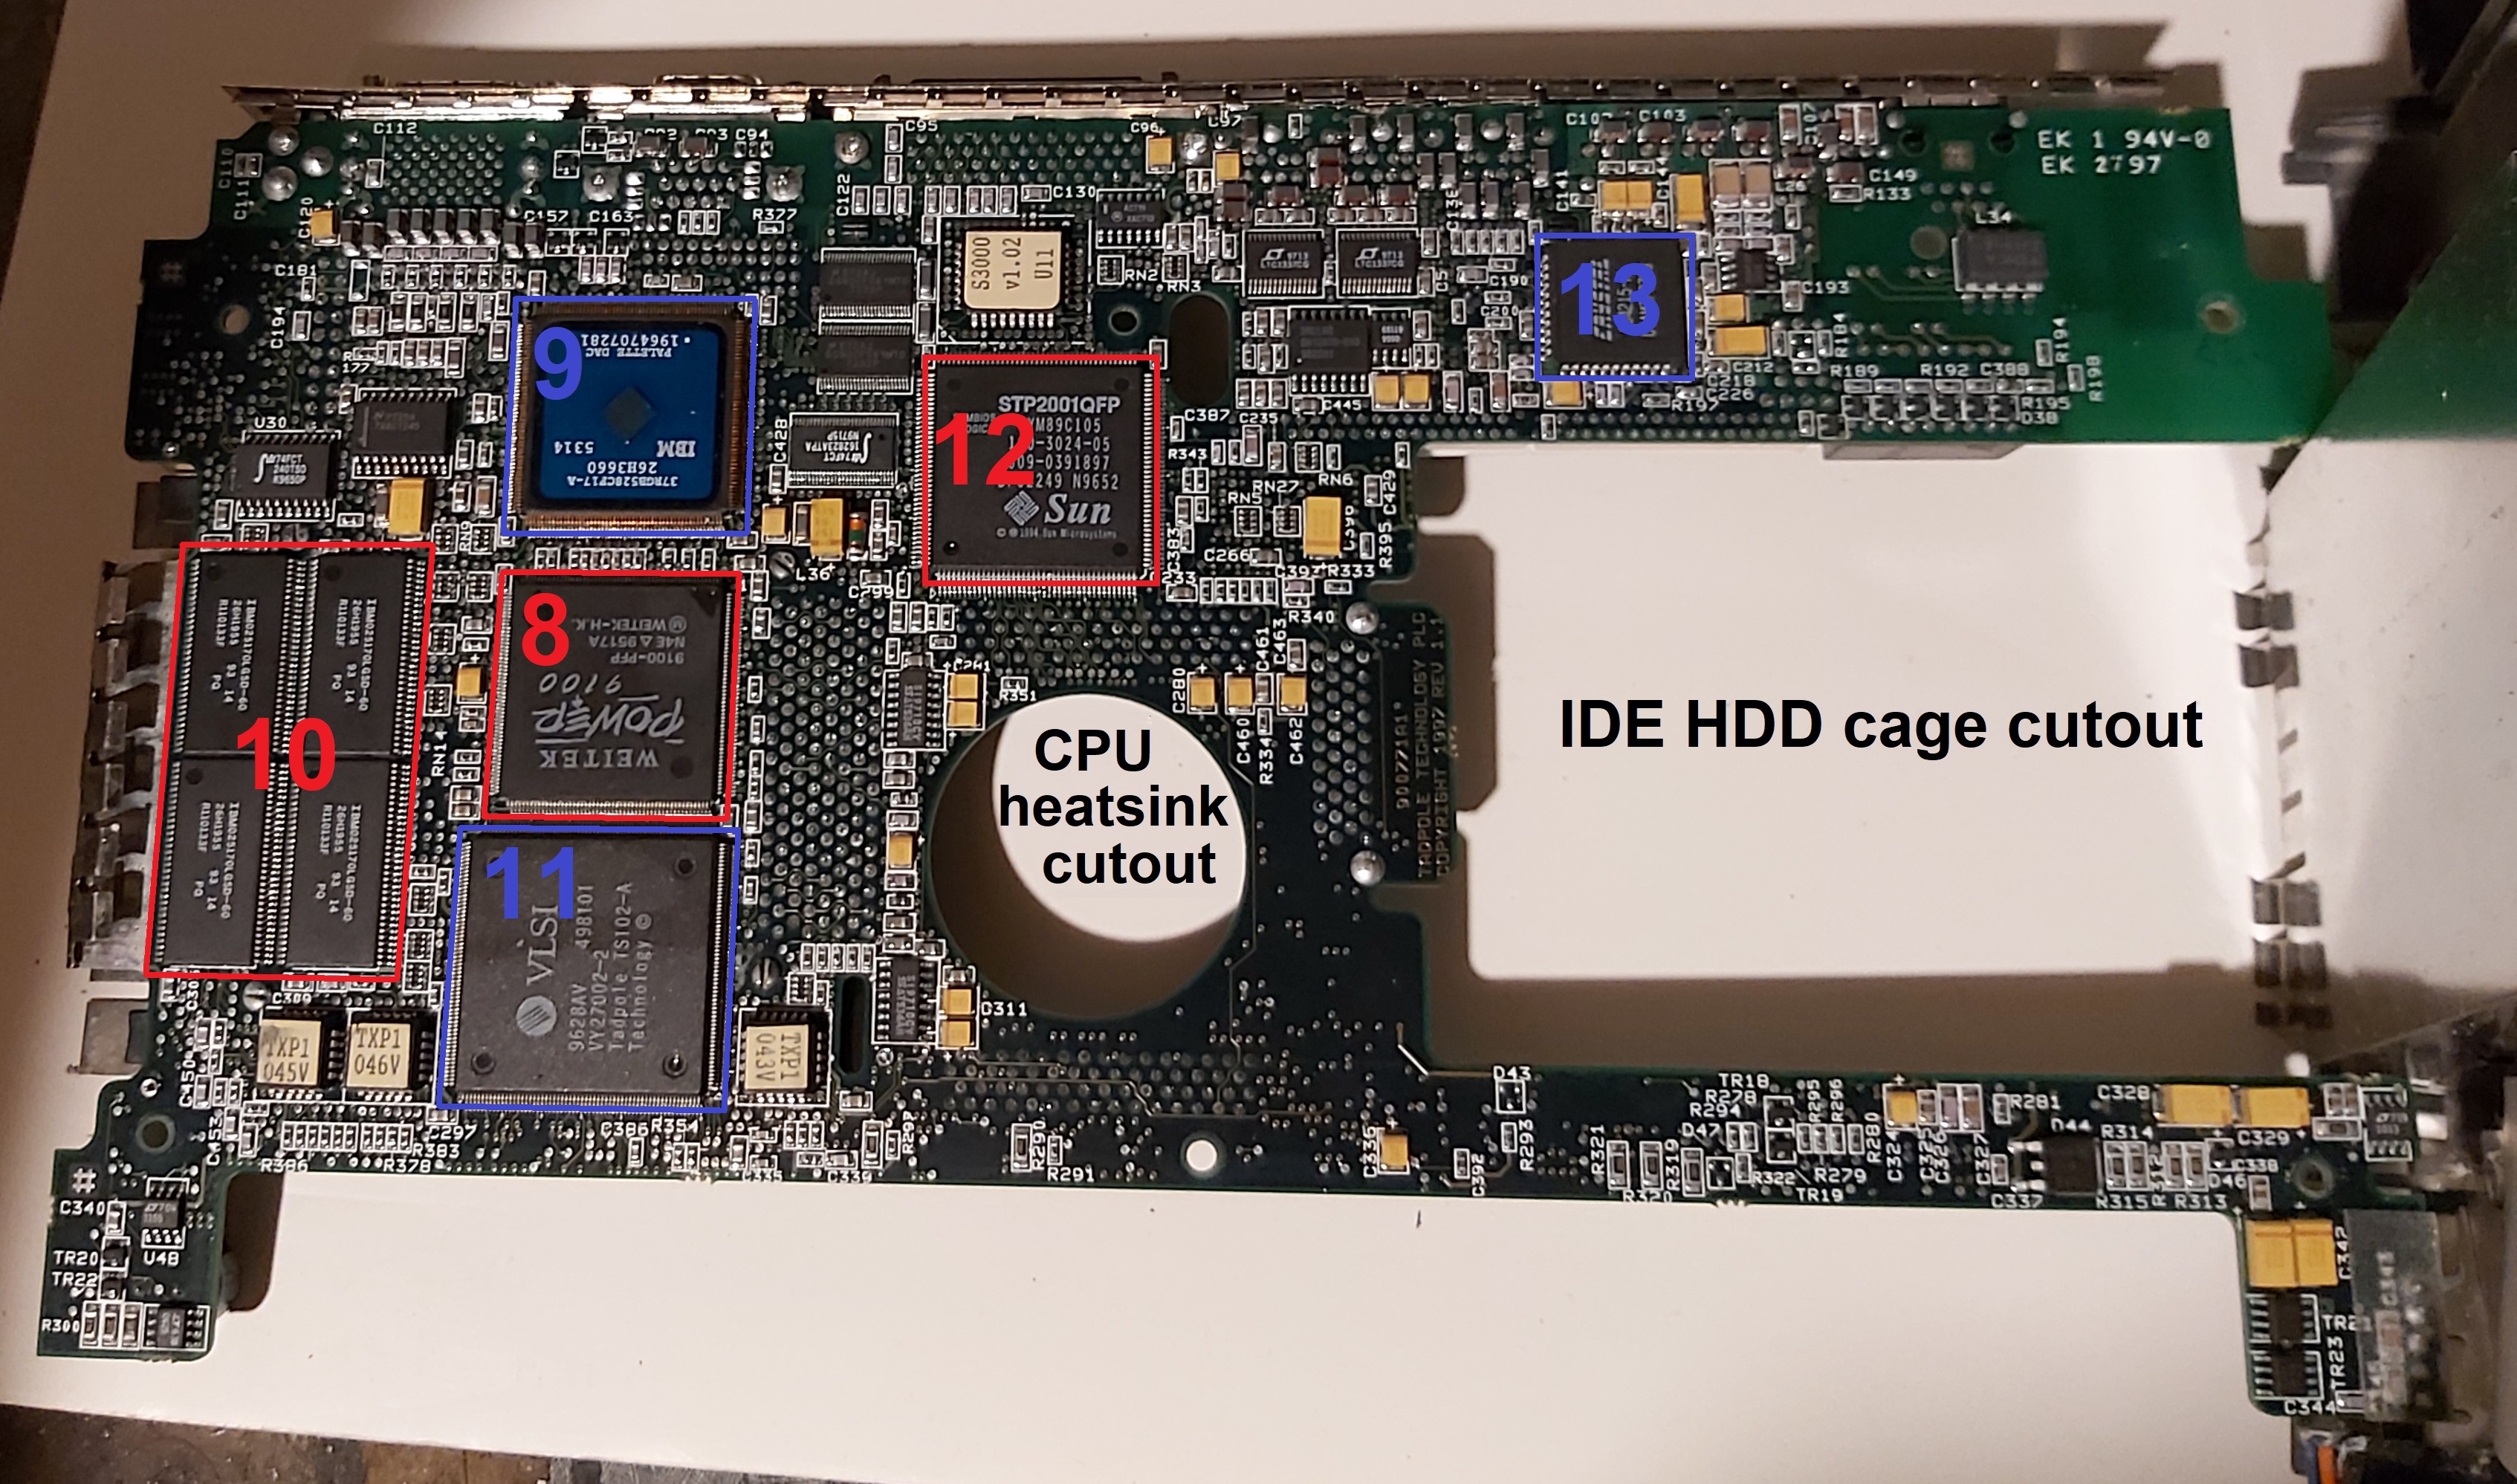
The reverse of the motherboard reveals the Weitek graphics chip (8), as well as the associated palette DAC (9) and video RAM (10). There’s also a custom Tadpole controller that handles laptop-specific functionality such as PCMCIA/sleep/battery/brightness (11), a Sun-branded SBus I/O controller (12) that also interfaces with the settings EPROM chip directly above it, and a 16-bit multimedia audio codec (13):
Here’s a zip of these pics without the red and blue markups.
And following is a detailed description of the chips shown in this post (by number):
- (1) MCM69P536BTQ4.5 - 32k x 36 cache sram (4.5 ns)
- (2) IDT74FCT - bus tranceivers
- (3) STP4000QFP - ISDN controller
- (4) MB86907 - 170MHz TurboSPARC CPU
- (6) CMD PCI0640B - IDE controller
- (7) STP2000QFP - Ethernet, parallel port, SCSI, and SBus DMA in a single controller
- (8) Power Weitek 9100 - video processor
- (9) IBM 26H3660 - video palette DAC
- (10) IBM025170LG5D-60 - video RAM
- (11) Tadpole TS102-A - PCMCIA controller, as well as power/battery/sleep, LCD brightness, TrackPoint, external keyboard/mouse, and status display functionality via a Hitachi H8/337 microcontroller (located on the reverse of the daughter board holding the LCD status display)
- (12) STP2001QFP - SBus slave I/O controller (keyboard, serial, E-Bus for EPROM)
- (13) CRYSTAL CS4215-KL - 16-bit multimedia audio codec
Assembling the laptop again is also easy. Only 10 screws and 8 cable connections are removed during the entire teardown, all of which are easy to replace in reverse order. Plus, each component fits snugly back where it should without any issues (likely because of the magnesium alloy construction).
And for those wondering - yes, it booted and ran perfectly after reassembly. I even played a game of DOOM on it too ;-)
Final thoughts:
I was most surprised to see Sun-branded chips inside the Tadpole SPARCbook. Aside from the IDE controller and custom Tadpole controller, all of the chips I outlined are also commonly used in Sun SPARCstations. As a result, I think the designers of the SPARCbook thought more along the lines of “Let’s figure out how to fit a SPARCstation into a laptop chassis” instead of “Let’s figure out how to create a SPARC laptop”. This makes sense, since the latter would likely be far more expensive to do (and the SPARCbook is already insanely expensive).
While the SPARCbook was by far Tadpole’s most successful product (Sun systems ruled the 1990s UNIX workstation market), Tadpole also created a DEC Alpha laptop running VMS, an RS/6000 laptop running AIX, and even a Pentium laptop running SUSE Linux. It’s probably safe to assume that most of the chips in those systems mirror the same ones in the desktop workstations they were based on.
From looking online, the chassis design is nearly identical across these models, as well as between the SPARCbook 3000 series and earlier SPARCbook 3 series. I couldn’t help but be impressed by this design while I was performing the teardown. It’s quite clear that a great deal of thought and development went into this aspect alone. And considering that the SPARCbook is insanely thin for its time, this design focus certainly paid off.